Installation
SaleFlow has a user-friendly installer that will guide you through the installation process. in the following sections you will find the steps to install SaleFlow on cPanel platform (make sure to log into your cPanel account) and it's simmillar to other platforms.
Subdomain (optional)
this step is optional, you can install SaleFlow on a subdomain like: crm.yourdomain.com and to do so you need to follow the following steps:
1. Navigate to the "Domains" section and click on the "Domains" icon.

2. Click on the "Create A New Domain" button.

3. Enter the subdomain, Deselect the Share document root and Click on the "Submit" button.
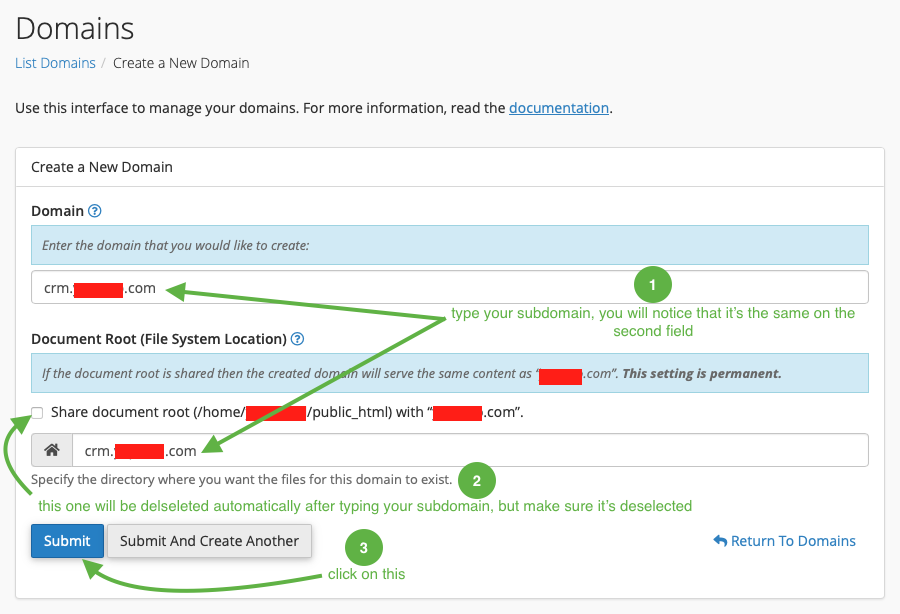
Note that the new subdomain should be available online within 5-10 minutes and may take up to 30-40 minutes to be fully functional.
Uploading
in this step you need to upload the SaleFlow files to your server, you can do this by following the following steps:
1. Navigate to the "Files" section and click on the "File Manager" icon.

2. Navigate to public_html or your subdoamin folder.
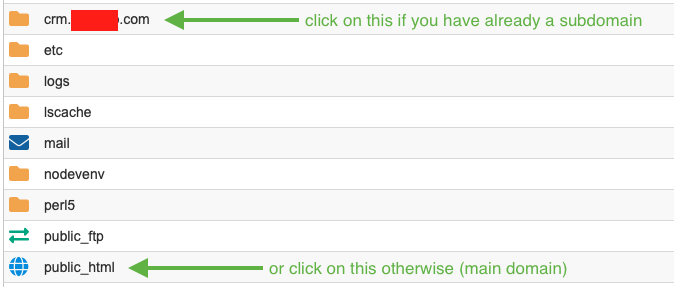
3. Upload the archive file, Extract it and delete it after extracting it.

Database
in this step we are going to create a new database and a new user for the database (remember to save these credentails including the password in a safe place as we are going to use them in the installer section), you can do this by following the following steps:
1. Navigate to the "Databases" section and click on the "MySQL® Databases" icon.

2. Navigate to "Create New Database" section and create a new database.
 after that a succuss message will appear, click on the "Go Back" button.

3. Navigate to "MySQL Users" section and create a new user.
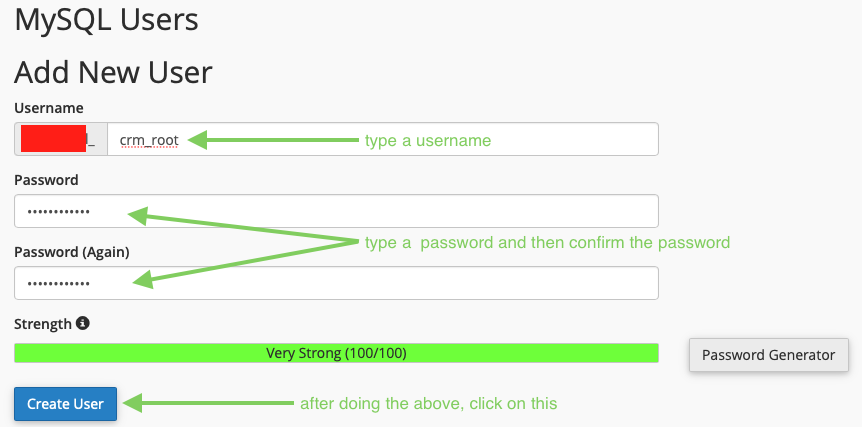 after that a succuss message will appear, click on the "Go Back" button.

4. Navigate to "Add User To Database" section and select the user and the database we have just created.
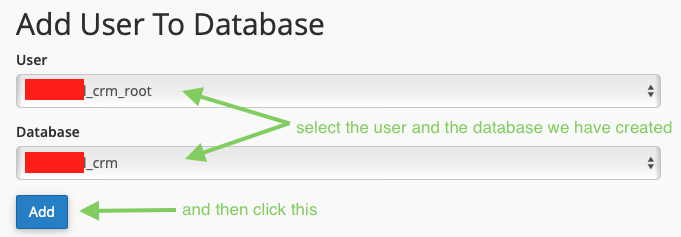
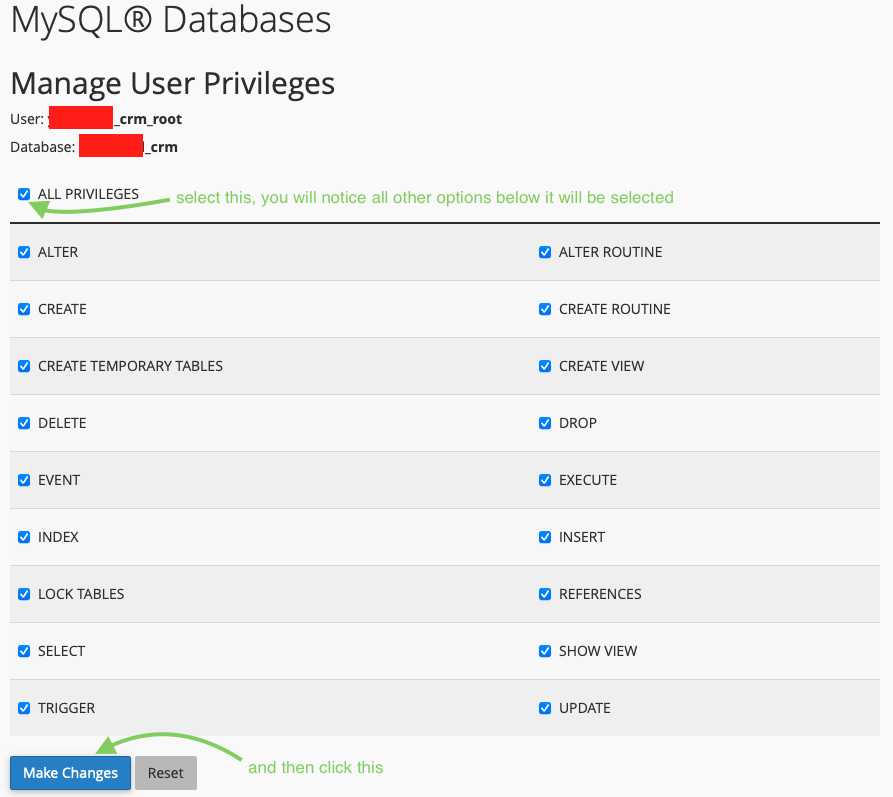
5. A new page will show, select "ALL PRIVILEGES" and then click on "Make Changes" button.
Installer
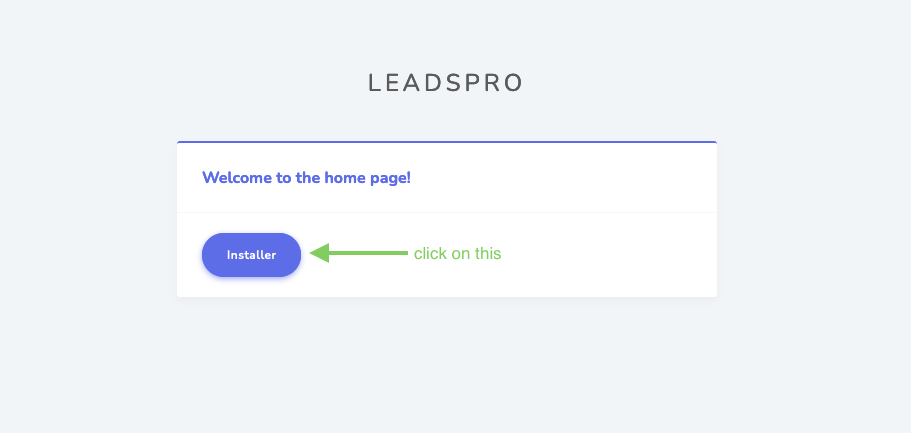
Based on the previous steps, navigate to the SaleFlow home page by entering the domain or the subdomain you have created in the browser, then do the following steps:
1. Click on the "Installer" button.
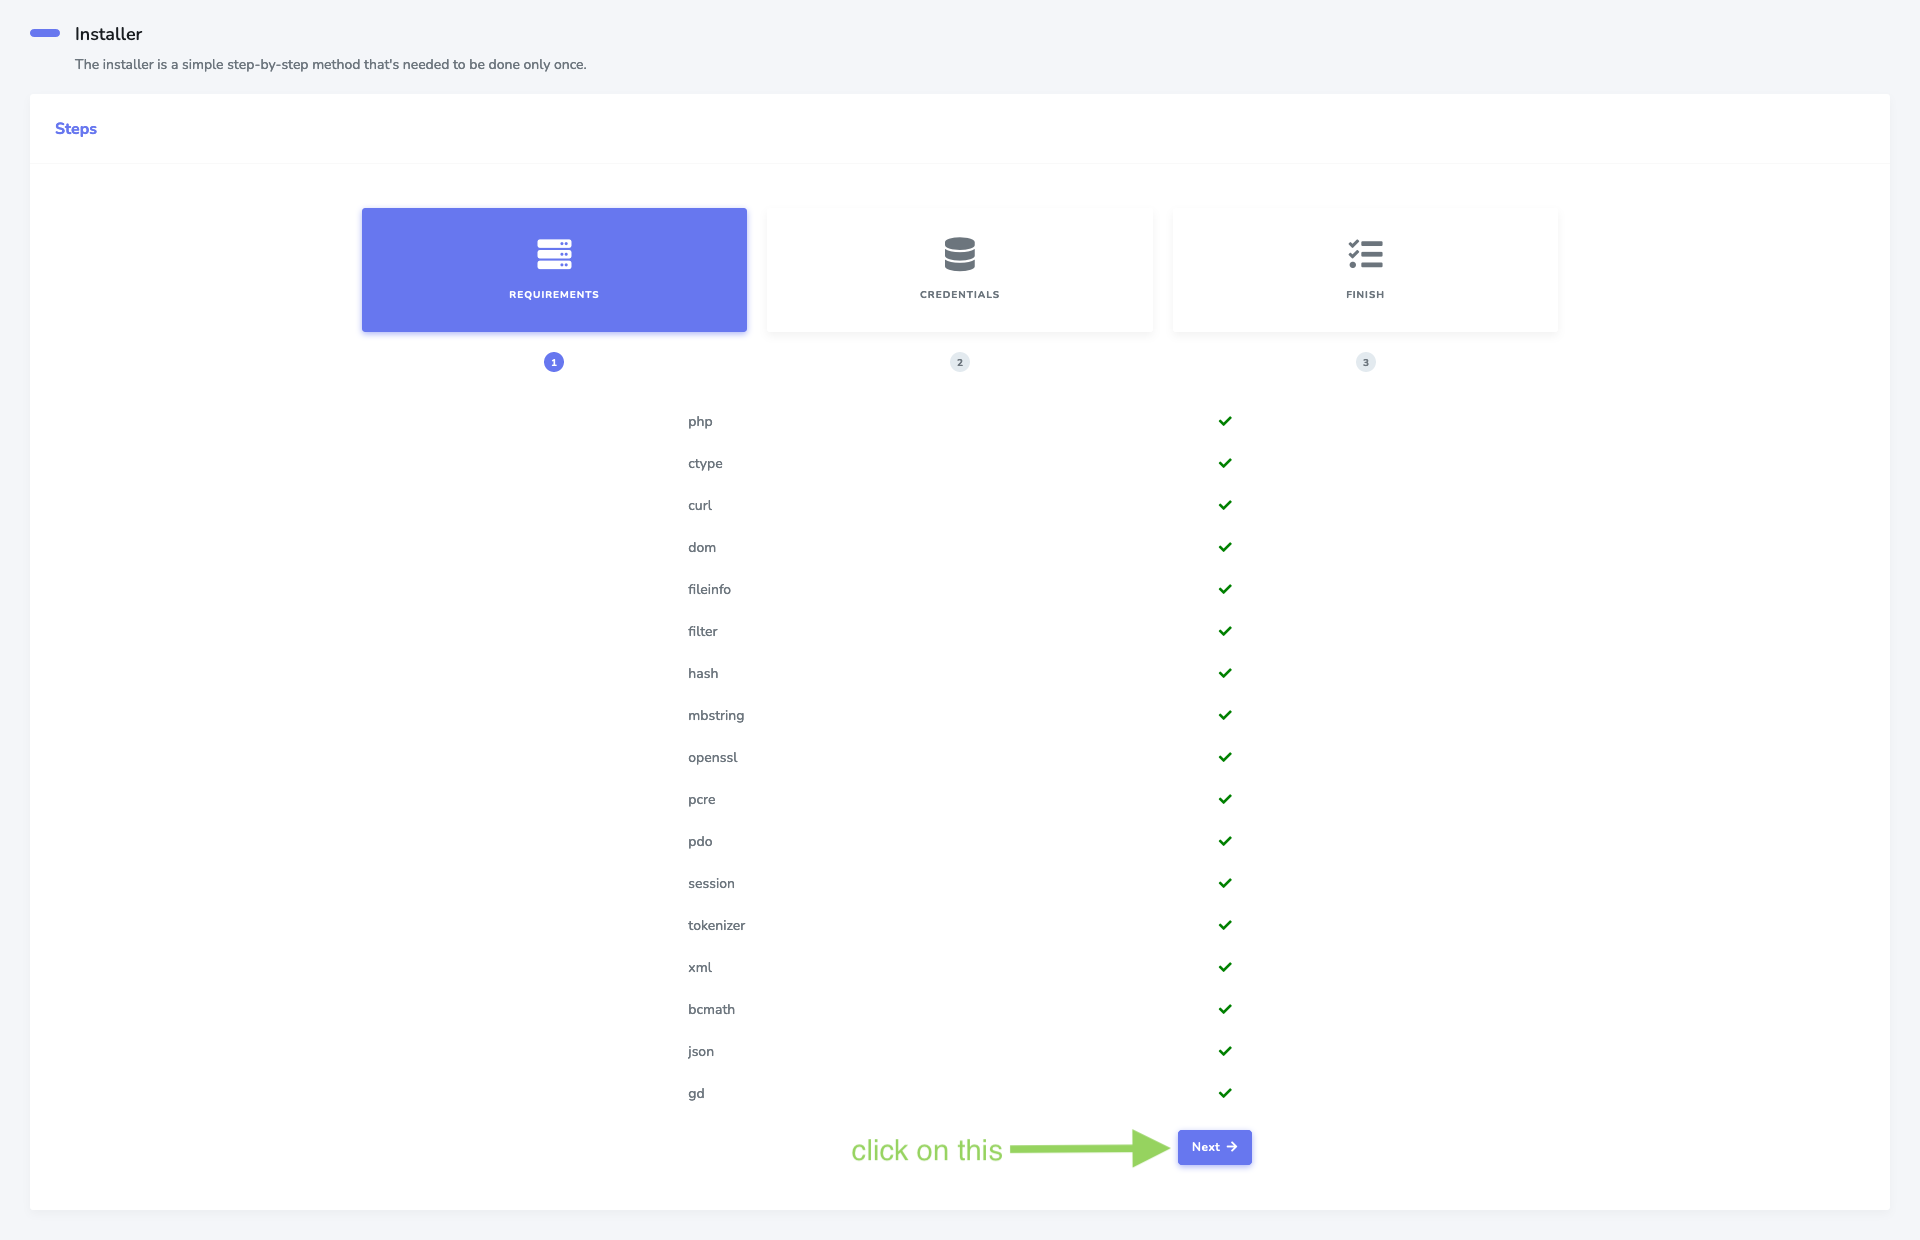
2. Click on the "Next" button.
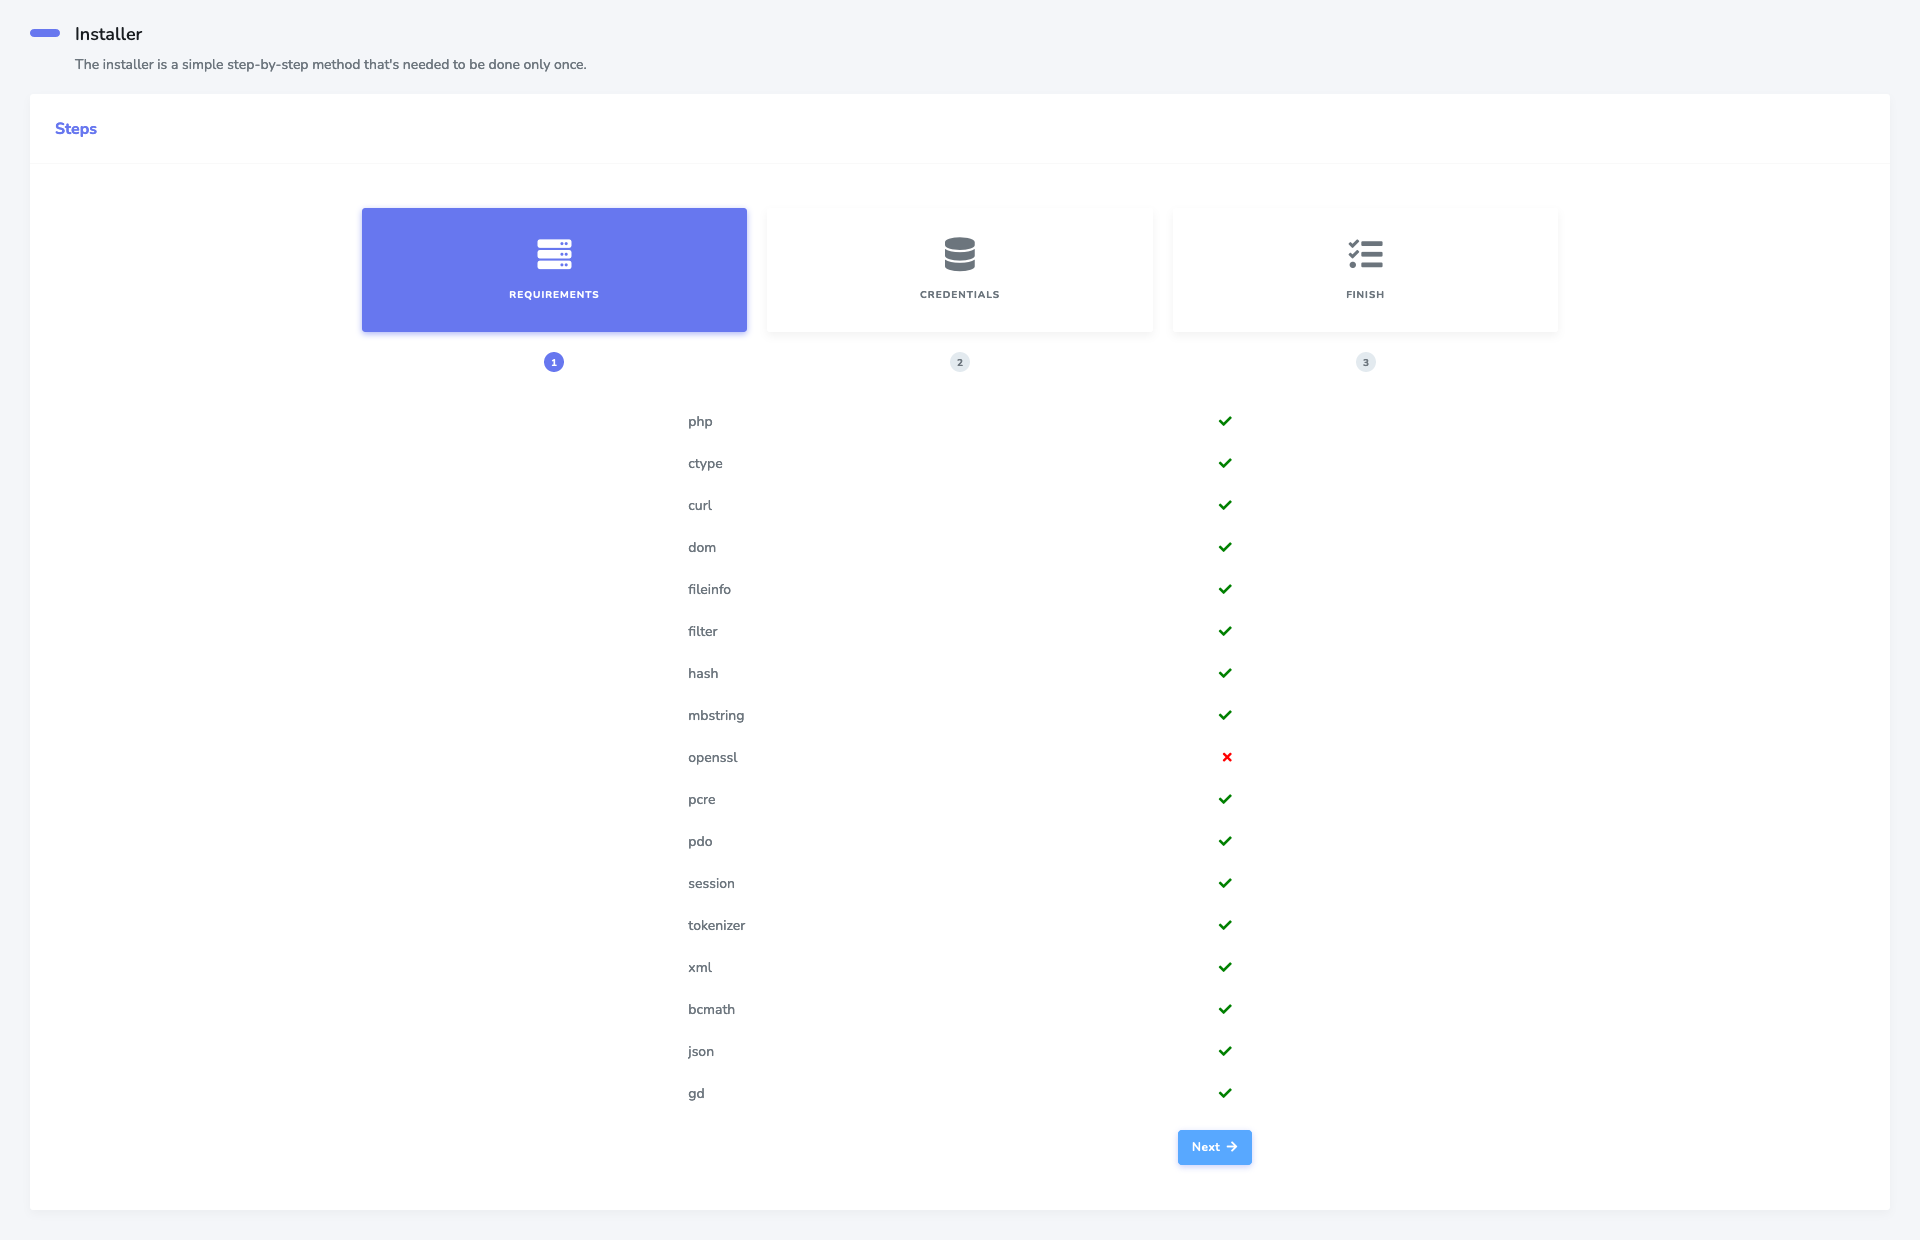
 if one or more of the requirements are not met, you will not be able to proceed with the installation.
3. Type the database credentials we have created and then Click on the "Next" button.
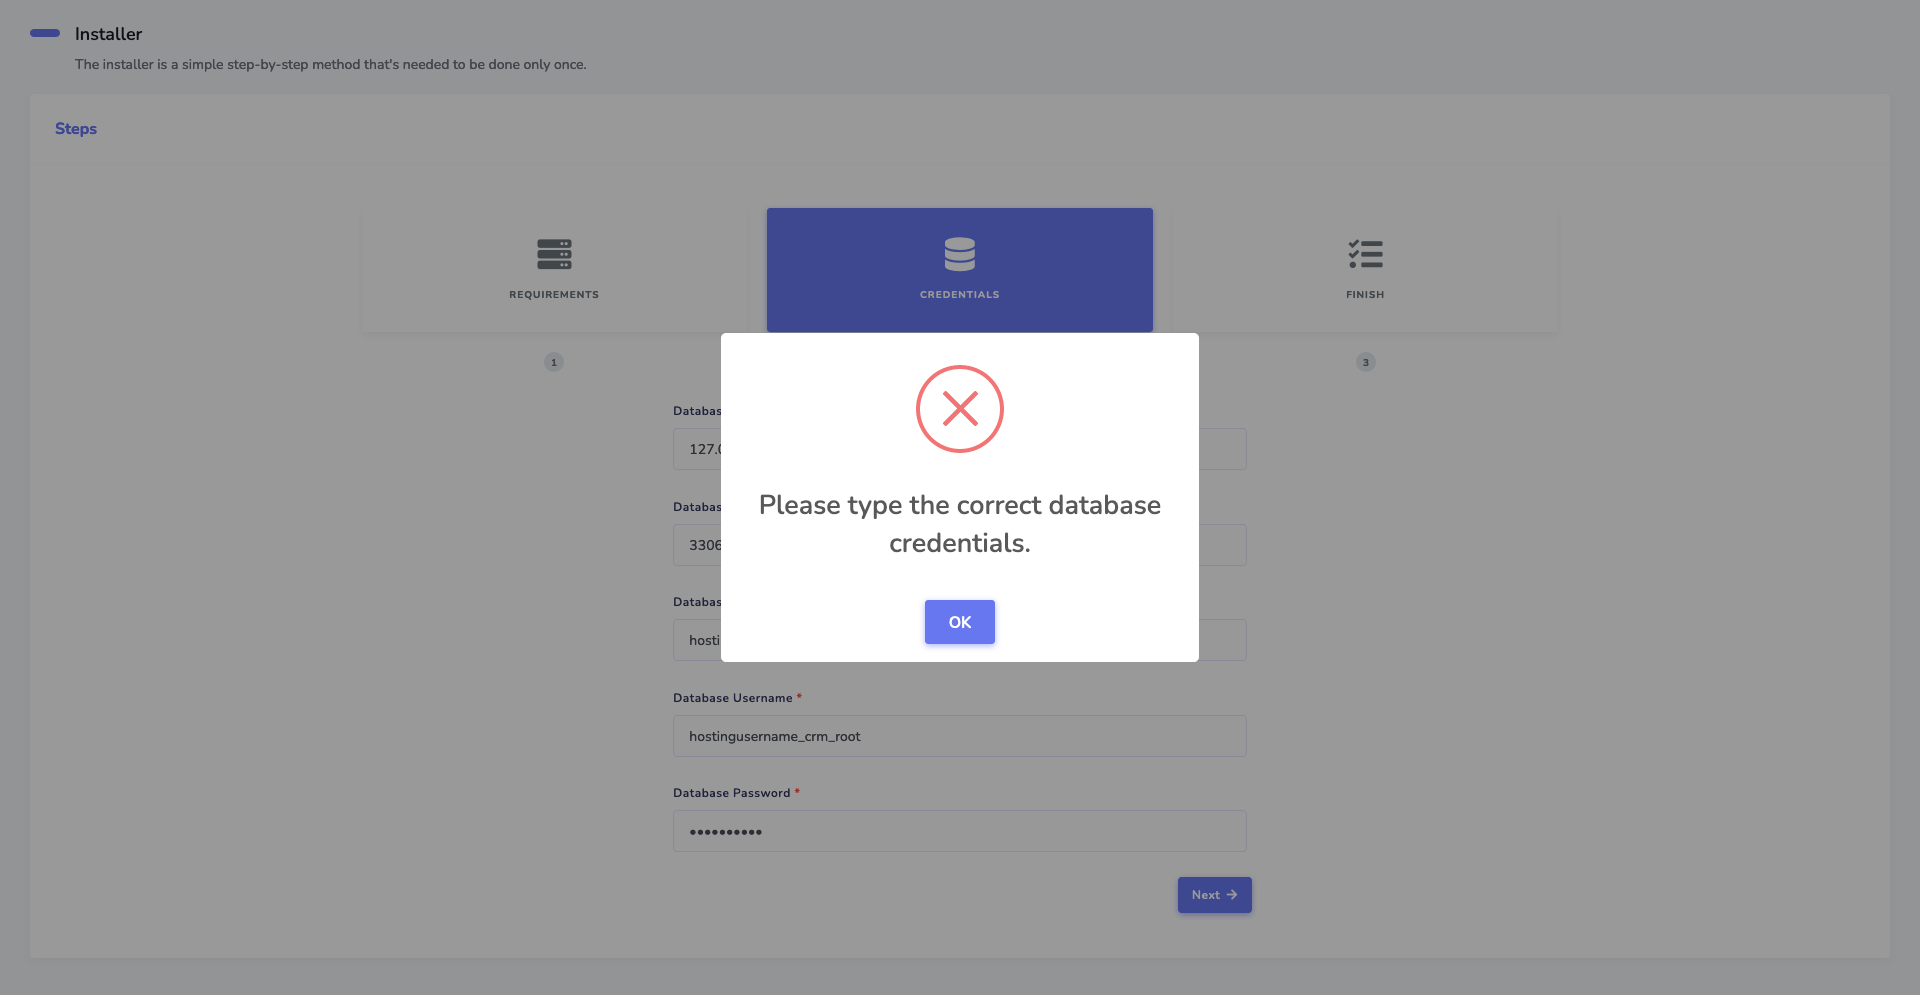
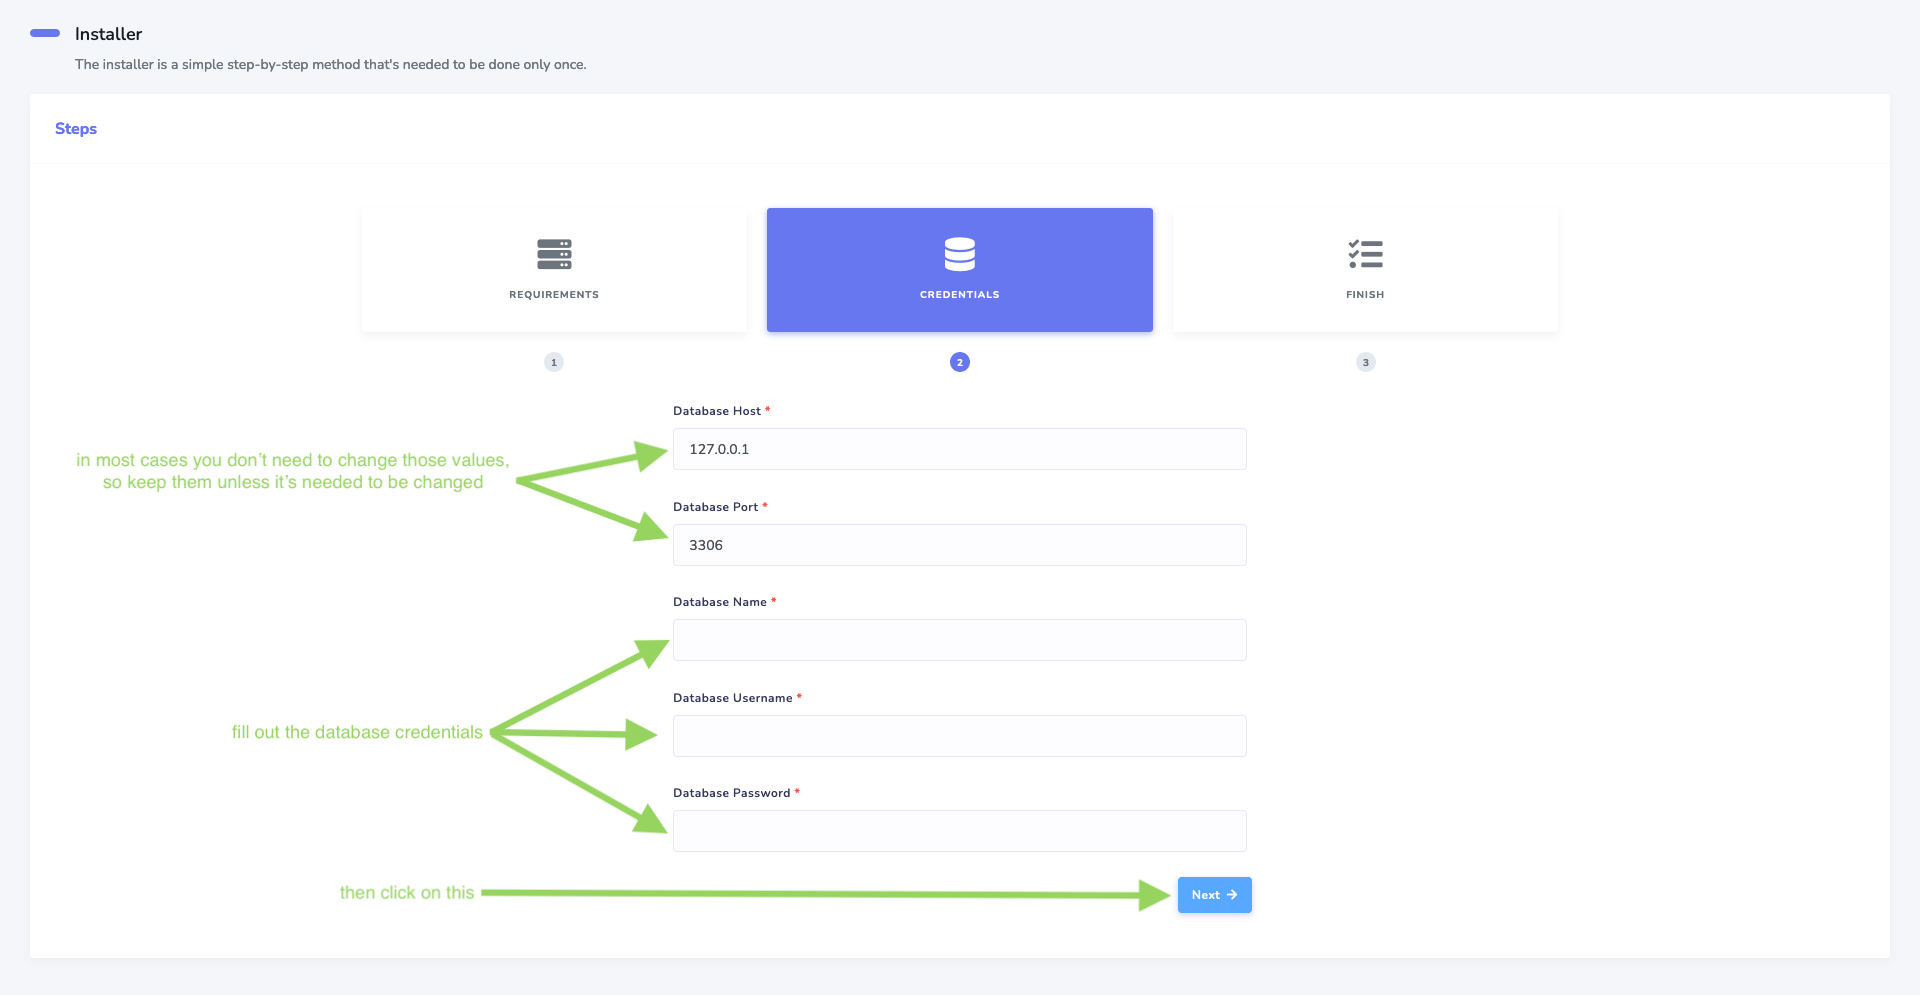 if the credentails is wrong an error message will appear.
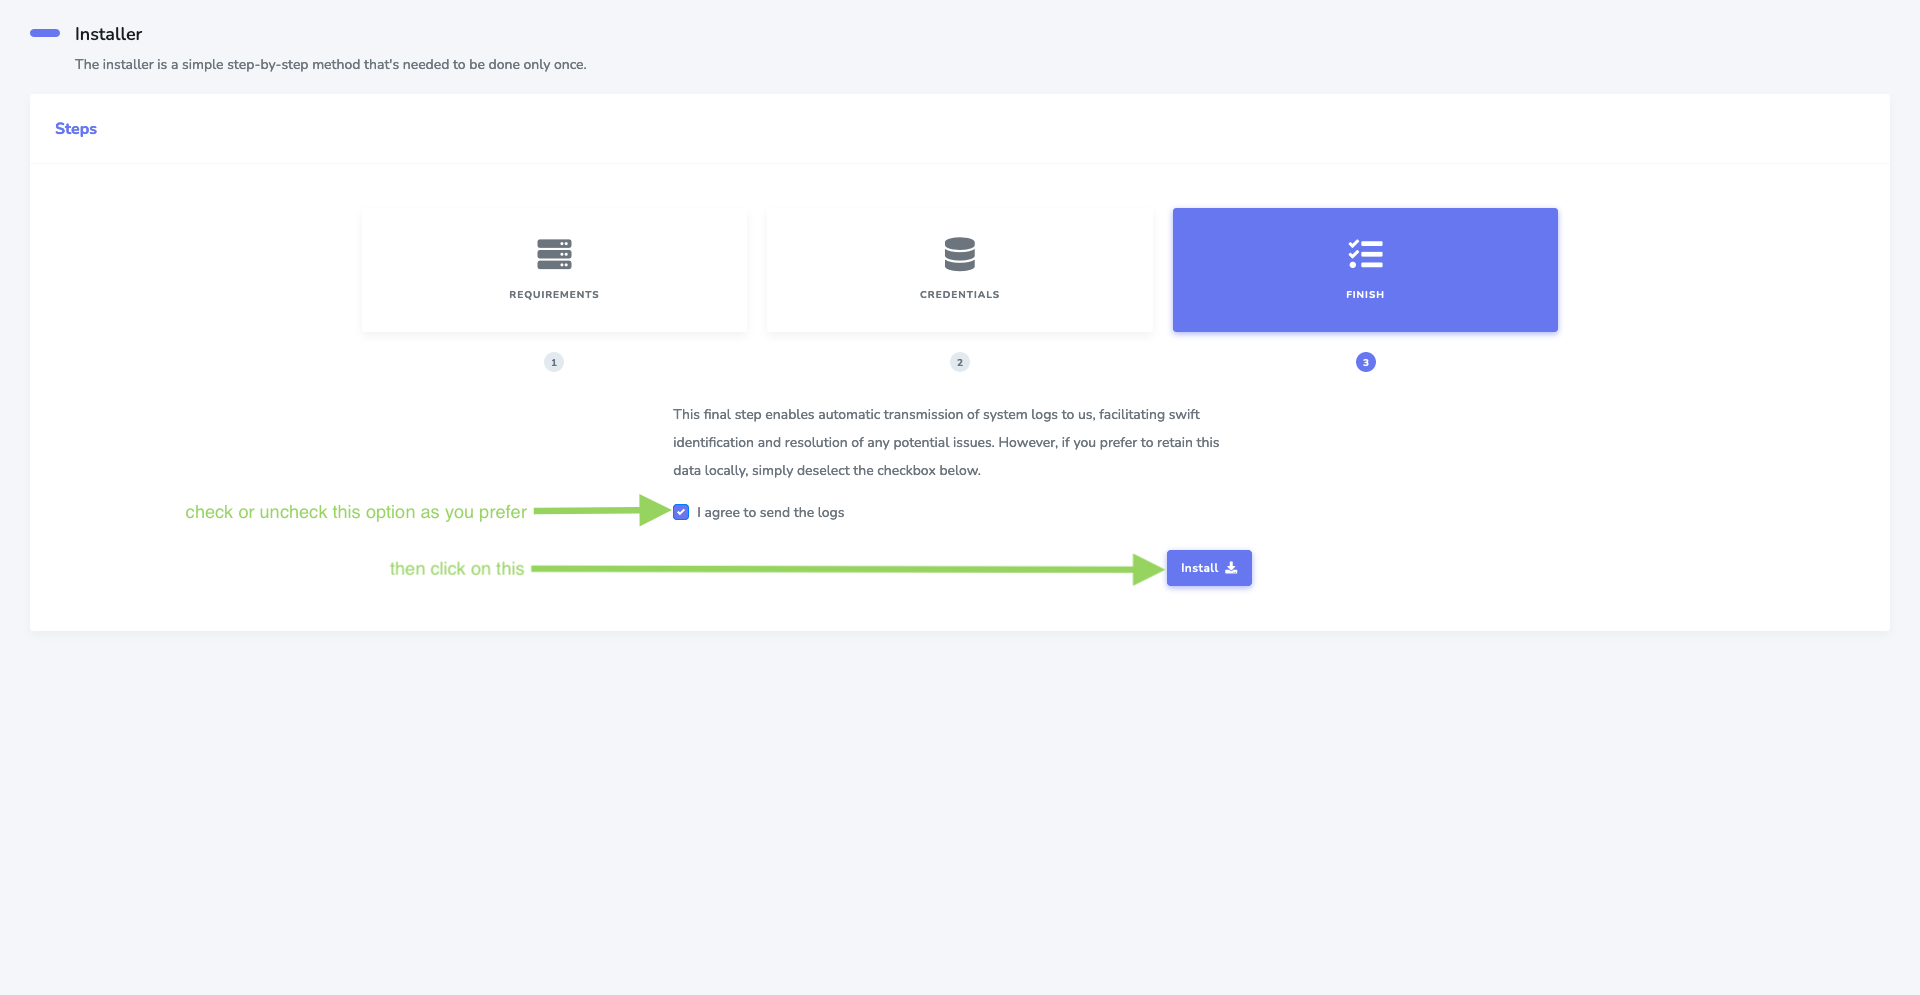
4. Check or uncheck sending the logs option and then click on the "Install" button.
 you will be redirected to the login page after the installation is done. the default username is "admin@example.com" and
the default password is "123456".